What's New in Verisurf 2017
Verisurf 2017 is a major update that empowers you to achieve greater heights of productivity than ever before. Download the Verisurf 2017 Datasheet now.
Features and Benefits
UX makeover enhances productivity
All new Icons, Ribbon Bars, Tabs, Groups, Panels, Galleries, Tech Tips, and redesigned Dialogs deliver a modern, Microsoft Ribbon Framework compliant user experience that enhances productivity.

SDK opens Verisurf to user apps
A new software development kit (SDK) enables programmatic access to Verisurf’s extensive metrology tool set – opening limitless possibilities for creating customized apps and interfaces.
Power Surface advances CAD surfacing
An all-new, unparalleled surfacing tool that creates advanced CAD surfaces within complex bounding curves, through pointclouds, or meshes.

New Scan Settings for better results
Separately configurable scan rate settings for pointcloud measurement and surface inspection, max scan angle, scan coloring, and scan overlap filtering all extract greater value from existing scanning hardware.
AutoAlign easier and more flexible
Rough align after only 1 or 2 targets are measured, support for out-of-sequence target measurement, and the ability to add a material offset for in-process measurement checks expand AutoAlign utility.
Improved R.E. with new Set Values
Modify position, size, shape, and orientation of points, pointclouds, or features to enforce fixed, nominal, or averaged values.
Sharpen/Remesh improve mesh editing
New options to edit meshes locally or improve meshes globally after editing or filtering provide greater control in reverse engineering workflows.
Crop meshes visually with Mouse Drag
The ability to crop meshes by dragging bounding box handles with the mouse pointer and a new “Undo” button provide greater precision over crop results.
Colorize provides insight
Quickly create colorful, blended color images of meshes to visually reveal mesh quality, curvature, and other important properties.

Curve Fit creates better splines
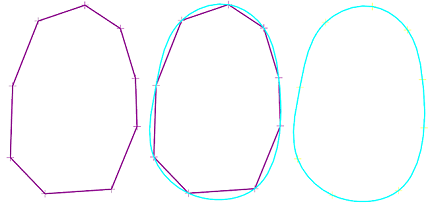
Create and control the fit of smooth splines through measured points easily with this useful and easy-to-use reverse engineering tool.

More UX improvements for usability
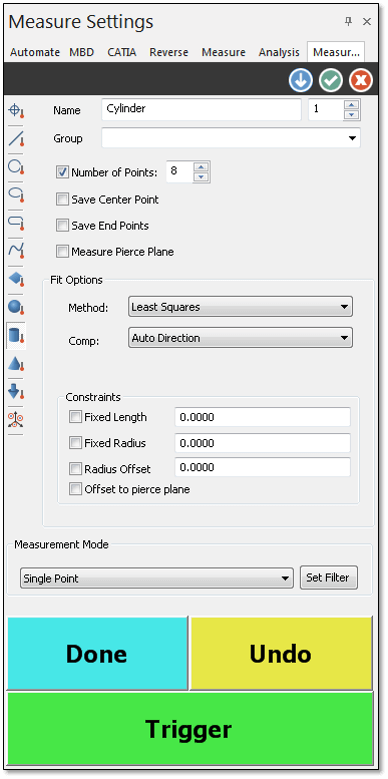
Multiple improvements to the organization and display of frequently used dialogs including the Measure- and Analysis/Build Settings make it easier than ever to find and adjust important controls.
Save Center and End Points options
Optionally, save measurement values for center and endpoints automatically during the measurement of selected features to reduce construction steps.
Surface Analyze speeds analysis
Analyzing large pointclouds to CAD surfaces has been optimized for speed – significantly reducing the time required for this frequently-repeated operation.
Sort helps optimize CMM inspections
The new ability to sort steps in AUTOMATE inspection plans based on Name, Distance from a feature, Feature Size, or in Reverse Order helps organize plans and optimize probe motion paths.

Amazing new 2-Point Measure
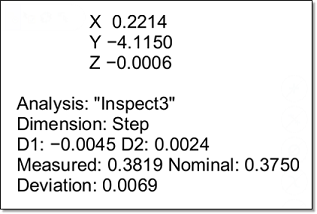
The simplicity of the new 2-point measure feature belies both its power and utility. Measure lengths, widths, heights, gaps, steps, and flushes with only 2 probe touches on any pair of parallel surfaces to instantaneously determine measured, nominal, and deviation values. A great tool for quickly determining a nominal dimension from a CAD model without the aid of a separate, dimensioned, paper drawing or error-prone manual computations based on adjacent dimensions.

Stay current with improved Installer
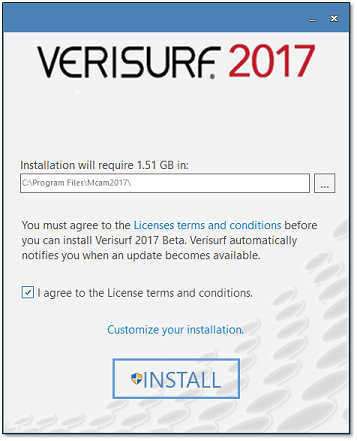
An all-new, integrated installer polls your system, installs the appropriate software and notifies you if updates are available – vastly simplifying the installation of Verisurf over prior releases.


