Software Highlights – CMM Programming
INCLUDE SCREEN CAPTURES and VIEWS in a CMM PLAN
Add Screenshots in a Plan
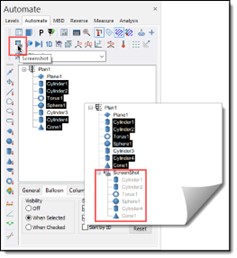
While building a CMM path Plan, you can easily add screenshots that will be included in the inspection report, providing great detail of measurement results. The user may pre-select the features for the screenshot, and if no features are selected, all Plan features appear in the screenshot.
- Select the features from the Plan to appear in the screenshot.

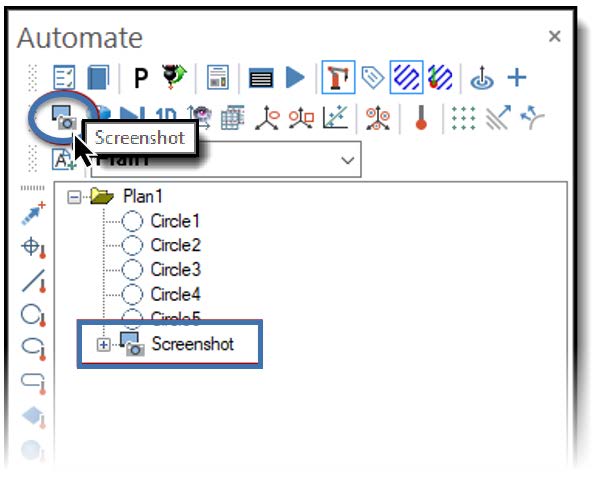
- Select the Screenshot tool button from the Automate Toolbar.
- The Graphics window appears in white; click in the window, manipulate the View to the desired screenshot view, and press Enter.
- The screenshot view is saved and appended to the end of the Plan.
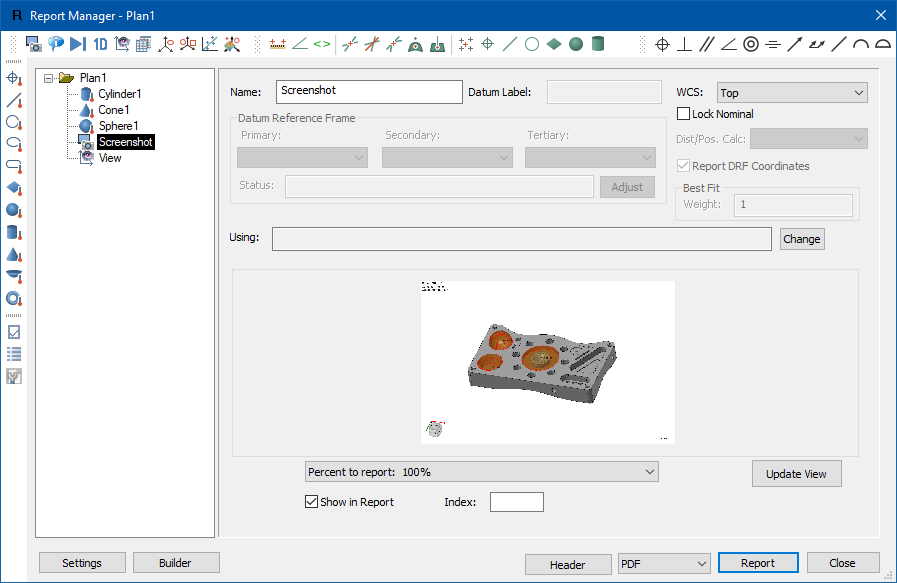
Screenshots and Views can be edited by double-clicking them in the AUTOMATE Manager and editing in the Report Manager which pops up for the user to make changes.
Selection of Features to be Included in Screenshots
In the Plan, the operator may select the features to be shown in a screenshot prior to clicking on the Screenshot toolbutton. After selecting the Screenshot toolbutton the operator finalizes the Screenshot view and presses Enter to store the result in the Plan.

Save Views in a CMM Plan
The Views control allows the ability to change the Model view during the Auto Inspect process without returning to the computer to do it manually. This is particularly useful when measuring complex parts and assemblies that require the user to perform measurements from several different orientations. It helps visualize the path during programming and simulation, and informs the operator as the program runs on the machine.
Add a View
- Select View from the Automate toolbar and the current graphics view gets stored. The View icon saves in the Data List.

The makings of a custom report:


